Small Closet Organization Ideas: How To Boost Your “Vertical Efficiency” From 40% To 90%
Here’s the real problem with your closet.
It’s not that it’s too small.
It’s that your vertical efficiency is low.
Most small closets use one hanging rod, one sad top shelf, and a dark floor full of shoes. That means you’re using maybe 40% of the available air space and wasting the rest.
In this guide, I’ll walk you through small closet organization ideas built on one goal: pushing that efficiency closer to 90% using a simple Zone Method.
We’ll talk exact rod heights, standard reach-in closet layout plans, and even a mini closet shelf spacing guide for folded clothes so you aren’t guessing.
Keep an eye out for the measurements. Those are the parts that completely change how much your closet can hold.
The Core Layouts (The “Blueprint” Content)
Before you buy a single bin, you need a layout.
Think of this section as your standard reach-in closet layout plan library.
We’re going to design around one key idea:
- High-use items live between 30 and 70 inches off the floor.
- Everything else goes either above that band or below it.
The “Double Hang” System (For Shirts/Pants)
If your closet still has one lonely rod in the middle, you’re losing half the hanging space.
In most small closets, a double hang system is the biggest upgrade you can make.
The exact measurements
- Bottom rod: 40 inches (102 cm) from the floor
- Top rod: 80 inches (203 cm) from the floor
This gives you:
- Enough space for shirts, blouses, folded-over pants on hangers
- A small “air gap” between the lower clothes and the floor
- A top section that doesn’t drag on the lower rod
If you’re on the shorter side, you can drop both rods slightly (for example, 38″ and 78″), but I’d keep 40/80 as your starting point.
Where it works best
- Standard reach-in closets that are at least 22–24 inches deep
- People who mostly hang shirts, blouses, and pants
- Shared closets where you want a “his/hers” split or “work/play” split
In my experience, once you install double hanging, you instantly feel like you’ve moved into a bigger home. It’s that dramatic.
The “Long Hang + Shelves” Hybrid (For Dresses)
Not everything can be double hang. Maxi dresses, coats, long cardigans and abayas need uninterrupted vertical space.
That doesn’t mean they get the entire closet.
The rule
- Dedicate 12–18 inches of closet width to long hanging.
- Use the rest of the width for shelving or double hanging.
So, if your closet is 60 inches wide:
- 12–18 inches for long hang (one side)
- 42–48 inches for double hang or shelves
This gives you:
- One clean, wrinkle-free zone for long items
- A much more efficient use of the remaining width
I prefer putting long hanging on one side, not the center. That way your shelves or double rods can run uninterrupted and you don’t create a dark “tunnel” in the middle.
Shelf Engineering: What Goes Where?
Most people treat closet shelves like random landing spots. That’s how you end up with teetering sweater towers and lost jeans.
Let’s engineer them properly.
The 12-Inch Rule
Look up in your closet for a second.
Is your top shelf almost kissing the ceiling?
If yes, it’s too high to be truly useful.
The fix
- Install or lower your top shelf to be about 12 inches (30 cm) below the ceiling.
That 12-inch gap above the shelf becomes deep storage:
- Suitcases
- Winter bedding
- Out-of-season clothing in labeled bins
You still gain a “bonus zone” without making the shelf itself unreachable.
Now we’ll get more precise with a closet shelf spacing guide for folded clothes so your stacks actually fit the way they should.
| Item Type | Ideal Stack Height (Approx.) | Recommended Shelf Spacing | Notes |
|---|---|---|---|
| Sweaters / Knitwear | 8–10 inches | 10–12 inches between shelves | Keep stacks to 4–5 pieces to avoid sagging. |
| Jeans / Heavy Pants | 8–10 inches | 10–12 inches between shelves | Fold in thirds for neater stacks. |
| T-shirts / Light Tops | 6–8 inches | 8–10 inches between shelves | Better file-folded in bins if very many. |
| Purses / Handbags | 10–12 inches | 12–14 inches between shelves | Use acrylic dividers to keep them upright. |
| Shoes (Flats / Sneakers) | 4–6 inches | 6–8 inches between shelves | More shelves = more pairs per vertical foot. |
| Ankle Boots | 8–9 inches | 9–10 inches between shelves | Reserve one or two shelves for taller shoes. |
You don’t need perfection.
You just need shelves that match what you own.
In my experience, 12-inch spacing is the sweet spot for most folded clothes. It’s enough room for your hand to slide in, but not so tall that the stack collapses.
The “Door & Floor” Strategy (Dead Space)
Once your rods and shelves are dialed in, it’s time to deal with the two most abused zones in any small closet:
- The door
- The floor
The Back-of-Door “Utility Wall”
Please don’t waste your closet door on a flimsy over-the-door shoe organizer unless you genuinely have no other option.
That real estate can work much harder.
I recommend treating the door as a mini utility wall with an Elfa-style track system (or any modular rail system).
You can mix:
- Small baskets for scarves and socks
- Hooks for belts and ties
- Shallow racks for jewelry, watches, or hijabs
- A narrow bin for lint rollers and small accessories
The advantage is flexibility.
You can reconfigure as your wardrobe changes instead of being stuck with one type of holder.
Once you do this, you’ll notice your dresser top and nightstand magically clear up.
The “No-Shoe” Floor Policy
Here’s a rule I enforce in almost every small closet I design:
The closet floor is not for loose shoes.
The floor is the hardest place to see and reach. Anything directly on it becomes a black hole.
Instead, use the floor for:
- A rolling cart with drawers (for gym gear, accessories, or off-season items)
- A lidded laundry hamper
- A shallow under-shelf drawer unit
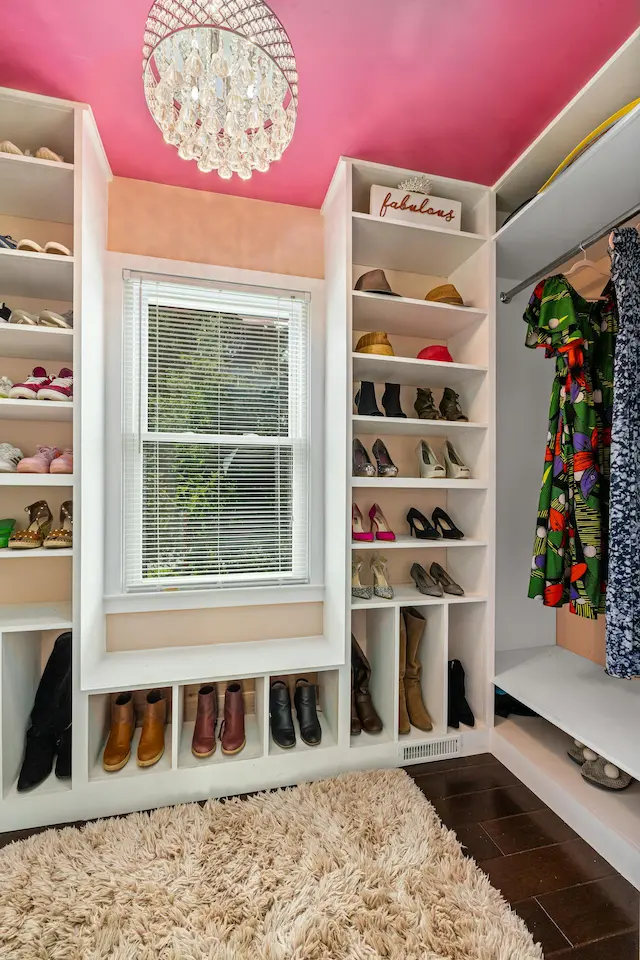
Then move shoes to:
- Low shelves (6–8 inch spacing)
- Vertical shoe racks
- Over-door or back-of-door systems
In my experience, the “no-shoe floor policy” is one of the fastest visual upgrades. The closet immediately feels calmer and more intentional.
The “Lighting” Factor (The Underrated Tip)
Dark closets are clutter magnets.
If you can’t see it clearly, you won’t keep it organized.
Battery-Operated Motion Lights
I’m a huge fan of battery-operated LED motion lights for small closets.
Why they work:
- No electrician needed
- They turn on automatically when you open the door
- They light up dark corners, especially lower shelves and the back of deep closets
Where to place them:
- Under the top shelf, pointing down onto clothes
- Along the side walls, mid-height
- Under each shelf if you have deep storage
“Dark corners = clutter accumulation” sounds dramatic, but it’s true. Once you bring light in, you’re far less likely to overstuff those areas because you’re actually looking at them.
I prefer warm white (around 2700–3000K) so the closet feels inviting and colors look natural.
Conclusion & Troubleshooting
By now, you’ve got:
- A double hang or hybrid layout that actually respects your vertical space
- A shelf spacing plan so folded clothes stay tidy
- A door and floor strategy that removes dead zones
- Lighting so your system actually stays functional long-term
That’s how you move from 40% to something closer to 90% vertical efficiency in a small closet.
Let’s quickly address two common issues that always come up.
“What if I can’t drill holes?” (Renter Section)
If you’re renting, you might not be allowed to add rods, tracks, or new shelves. That doesn’t mean you’re stuck.
Here’s what I recommend.
1. Heavy-duty tension rods
- Use one tension rod for regular hanging
- Add a second tension rod below for shorter items (shirts, trousers)
- Avoid overloading; check the weight rating carefully
2. Hanging sweater organizers
These are usually sold for sweaters, but you can repurpose them:
- For jeans (one pair per cubby)
- For shoes (especially sneakers)
- For bags and small purses
3. Over-rod organizers
- Hanging shelves that hook over your existing rod
- Great for T-shirts, sleepwear, or gym clothes
Is it as clean as a fully built custom system? No.
But in my experience, a smart combination of tension rods + hanging organizers can still double your usable space without a single drill hole.
FAQ: How to fold clothes to save space?
Folding matters more than most people think.
If you’ve ever had piles that collapse every time you pull one shirt out, you’ve met the enemy: stacking.
There are two main approaches:
- Stacking (Traditional)
- Clothes are piled on top of each other.
- You only see what’s on top.
- Every time you grab from the middle, the stack destabilizes.
- File Folding (Vertical)
- Clothes are folded and stored upright in a drawer or bin.
- You see every piece at a glance.
- Pulling one item out doesn’t disturb the others.
On average, file folding can save around 30% of visible space inside drawers and bins, especially for:
- T-shirts
- Leggings
- Pyjamas
- Light sweaters
I recommend:
- File folding in drawers, bins, and hanging fabric organizers
- Stacking only for heavier items like thick sweaters, where vertical folding can stretch the fabric
If you combine file folding with the shelf spacing guide above and a thoughtful layout, your small closet will genuinely hold more than you thought possible.
And more importantly, you’ll be able to find everything without fighting a pile of falling clothes every morning.