Vertical Storage Ideas for Small Apartments – How to Use Your “Air Rights
If you feel like your small apartment is bursting at the seams, it’s usually not because you own too much.
It’s because everything you own is fighting for the same 2–3 feet of floor and lower wall space, while the air above your head is doing absolutely nothing for you.
The most powerful vertical storage ideas for small apartments start from this mindset shift: you’re not just decorating square footage, you’re designing cubic footage. In this guide, we’ll treat your walls, door frames, and awkward gaps as prime real estate, and I’ll share exact measurements and install tips as we go so you can copy this at home without guessing.
Let’s walk through a simple, evergreen framework you can use in any small space: the 12-inch rule above doors, renter-friendly tension-rod structures, a “nook” audit for skinny rolling carts, and a quick way to calculate how much storage you’ve added without ever touching the floor.
The “Square Footage” Myth vs. Cubic Footage Reality
Most floor plans make you obsess over square meters or square feet.
That’s useful for rent negotiations, but it’s terrible for storage planning.
In a typical small apartment with standard ceiling heights, you have:
- A thin band of “usable” space from floor up to about 1.8 m / 6 ft where everyone stores everything.
- Another entire band of air above door frames, wardrobes, and fridges that sits completely empty.
In my experience, once people start thinking in volume, three things happen:
- They stop buying more baskets for the floor.
- They start looking above, behind, and between furniture.
- Their home suddenly feels calmer, because storage climbs up the walls instead of creeping out across the room.
Keep that idea in your back pocket as we move through the next sections. We’re basically going to upgrade your apartment’s “air rights” into real storage without making it feel cramped.
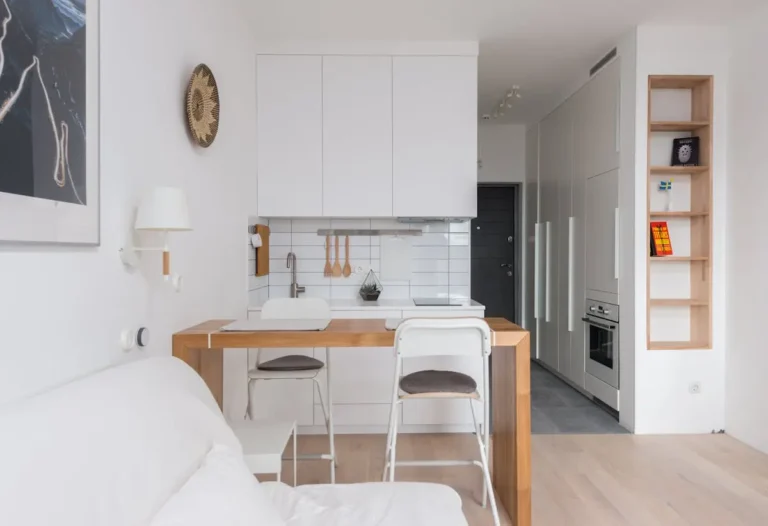
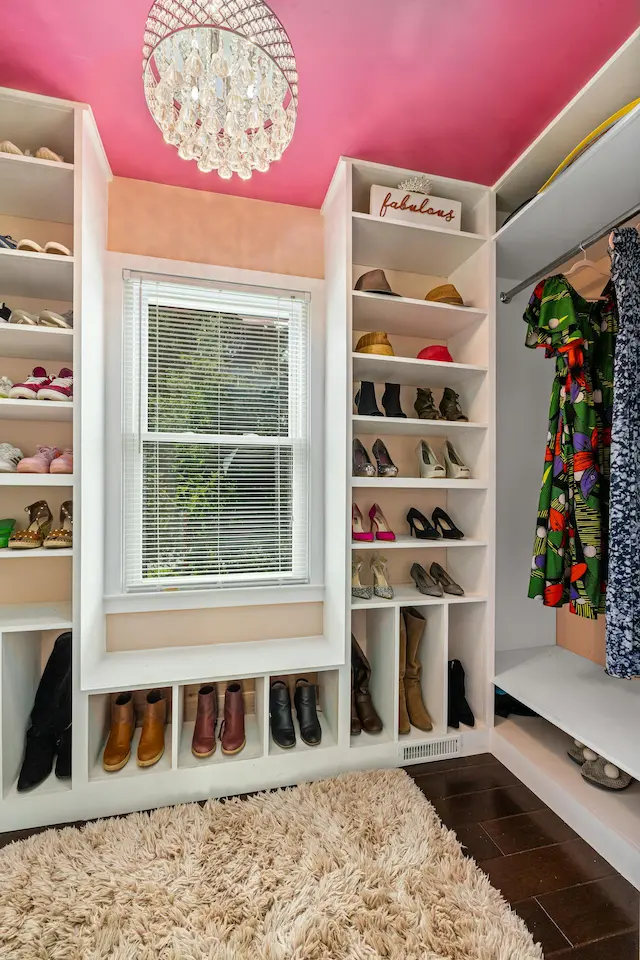
The 12-Inch Rule: Shelves Above Door Frames
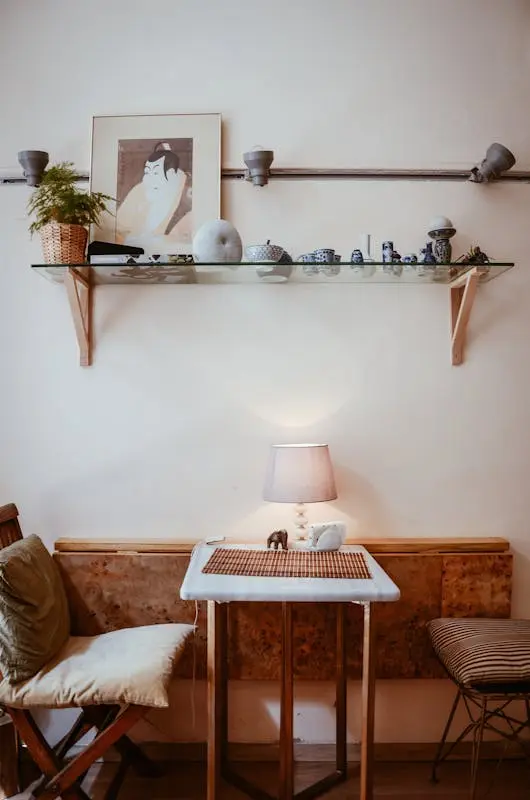
There is almost always 20–40 cm (8–16 inches) of dead space above every door frame in a small apartment.
Most people ignore it because it’s just “empty wall.” I treat it as a built-in storage zone.
The 12-inch rule is simple:
Use the band of wall starting about 12 inches (30 cm) above the top of the door frame as a continuous shelf line.
That keeps everything high enough not to feel visually heavy, but low enough to be reachable with a small step stool.
What to Store Above Doors

This is not the place for everyday items. This is passive storage:
- Off-season bedding and blankets in fabric bins
- Board games or puzzles
- Seasonal decor
- Extra paper goods (tissues, toilet paper, paper towels) in neat rows
If you’re in a studio, this is also a great home for things you don’t want looking “domestic” or messy, like cleaning refills or bulk buys from discount stores.
How to Install a Discreet Door-Frame Shelf
Keep it light and minimal so it feels architectural, not improvised.
Basic formula:
- Shelf depth: 8–10 inches (20–25 cm) is usually enough for most bins and boxes.
- Height above frame: start 12 inches (30 cm) above the door casing so you have room for decor and fingers.
- Bracket spacing: every 16–24 inches (40–60 cm), depending on the load.
You can use:
- Simple L-brackets painted the same color as the wall.
- A single run of pine or MDF board cut to width, also painted to match.
In my experience, painting shelf and brackets the same color as the wall reduces visual noise dramatically. It reads like part of the architecture instead of a DIY add-on.
Example Door-Frame Shelf Cheat Sheet
| Door Height | Ceiling Height | Suggested Shelf Height (from floor) | Ideal Shelf Depth |
|---|---|---|---|
| 80″ / 203 cm | 96″ / 244 cm | 92″ / 234 cm | 8–10″ / 20–25 cm |
| 80″ / 203 cm | 108″ / 274 cm | 96″ / 244 cm | 10″ / 25 cm |
| 84″ / 213 cm | 96″ / 244 cm | 92″ / 234 cm | 8–10″ / 20–25 cm |
You don’t need to be exact to the millimeter, but use this as a guide so the shelf doesn’t “crowd” the ceiling or sit awkwardly close to the door frame.
Tension Rod Engineering: Renter-Friendly “Fake Walls”
If you rent and can’t drill, tension rods are your best friends.
Most blogs stop at “hang a curtain with a tension rod.” You can go much further and create vertical storage structures that behave like fake walls.
Tension Rod Rules (So They Don’t Fall on Your Head)
To keep this renter friendly and safe:
- Always choose heavy-duty rods rated for at least 10–15 kg (22–33 lbs) if you’re hanging anything more than fabric.
- Extend them only to 80–90% of their max length. Fully extended rods are more likely to slip.
- Use them between two solid surfaces (tile-to-wall, wall-to-wall, cabinet-to-floor), not between flimsy plasterboard edges.
I personally prefer matte white or black rods because they visually disappear against most walls and ceilings.
Fake Wall for Hanging Plants or Tools
Instead of a bulky shelving unit, you can create a vertical grid:
- Install two or three horizontal tension rods between two walls (for example, across a narrow balcony door recess or hallway niche).
- Clip on S-hooks or shower rings.
- Hang:
- Lightweight planters
- Small baskets with clothespins, gloves, or cleaning supplies
- Kitchen tools like strainers, measuring cups, or oven mitts
This gives you a whole column of storage with almost zero floor footprint and no drilling.
Tension Rods Inside Closets and Cabinets
You can also hide vertical storage in existing furniture:
- Under the sink to hang spray bottles by their triggers.
- In a wardrobe to create a second row of hanging space for shorter items.
- Inside a tall cabinet to create a hidden rail for scarves, belts, or reusable shopping bags.
Don’t waste money on overly specialized gadgets for each category. In my experience, a pack of heavy-duty tension rods and a box of S-hooks covers 80% of your “I wish I had somewhere to hang this” problems.
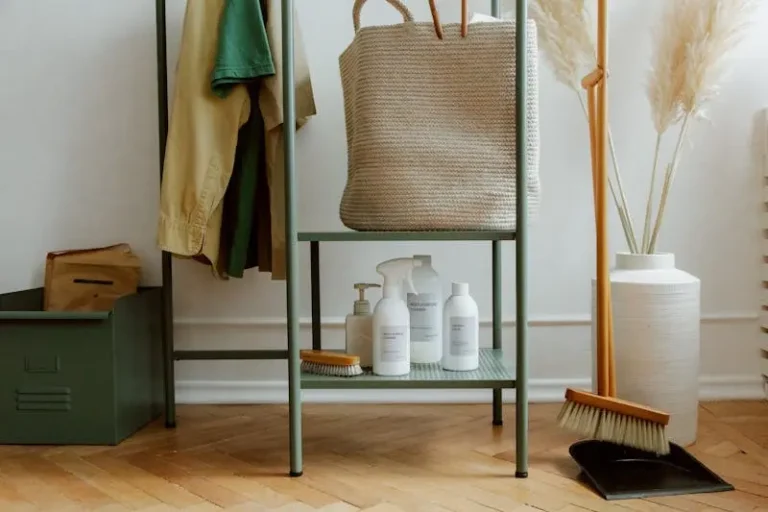
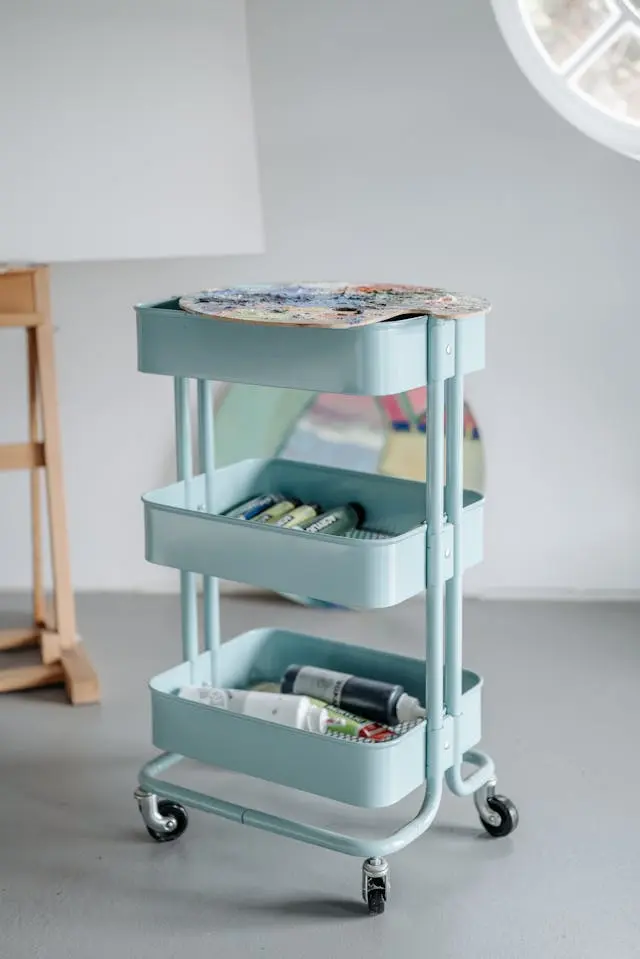
The “Nook” Audit: Slim Carts in Dead Gaps
Every small apartment has awkward gaps:
- Between the fridge and the wall
- Beside the washing machine
- Between the sofa and the balcony door
- At the end of a wardrobe run
These are usually 10–20 cm wide, and they collect dust bunnies instead of doing anything useful.
A nook audit is simply walking through your home and writing down:
- Every gap over 5 cm wide
- Its depth (how far back it goes)
- Its height (can you use the full height, or is there a radiator / window / handle?)
Once you have those numbers, you can hunt for slim rolling carts and shelves that are designed to live in those dead zones.
Where Slim Carts Work Best
Some of my favorite placements:
- Kitchen: A 5–8 inch (13–20 cm) wide cart between fridge and wall for oils, spices, foil, and wraps.
- Bathroom: A narrow cart between tub and vanity for extra toilet paper, cleaning products, and towels.
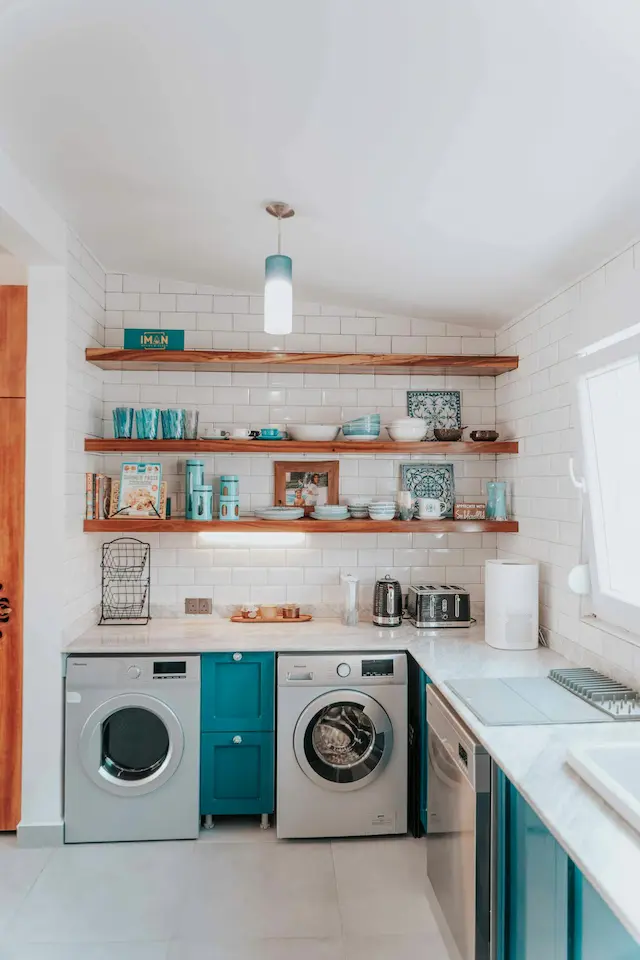
- Laundry corner: Beside a stacked washer/dryer to hold detergent, pegs, and lint rollers.
- Home office corner: A slim rolling tower beside the desk for stationery, tech cables, and notebooks.
If you’re on a strict budget, you don’t have to buy a designer piece. Just look for:
- Lockable wheels (so it doesn’t rattle every time you walk past).
- At least three shelves.
- A height that finishes just below any switches or windowsills.
Don’t be afraid to cut down metal or plastic units if needed. I’d rather you trim a fifty-dollar cart to fit perfectly than live with a too-short piece that wastes vertical space.
Over-the-Door Storage Hacks (Your Built-In Ladder of Space)
Over-the-door organizers are basically vertical storage pre-installed by your builder; you just have to claim it.
Instead of generic “shoe pockets,” think of over the door storage hacks as ways to build specific stations:
- A cleaning station on the back of the laundry or bathroom door.
- A pantry backup wall behind the kitchen door.
- A beauty station inside the bedroom or closet door.
Key guidelines:
- Choose organizers with a rigid frame if you’re storing anything heavier than socks or scarves.
- For doors that close against a wall, measure the clearance so the organizer doesn’t get crushed.
- If you’re worried about damage, look for models that hook over the top of the door and use small stabilizing bumpers at the bottom instead of screws.
In my experience, over-the-door storage makes the biggest difference in bathrooms and pantries, because those rooms are usually starved for wall space but full of doors.
Visualizing Your “Air Rights”: A Hallway Before & After
Let’s walk through a simple mental before/after so you can see the impact.
Before: Wasted Hallway
- One narrow hallway with three doors (bathroom, bedroom, storage).
- A single coat hook near the entrance.
- Everything else stored in already-full closets or piled on chairs.
Visually, the hallway looks “clean,” but every functional surface elsewhere is overloaded.
After: Hallway Using Vertical Storage
With a weekend and a small budget, you can turn that same hallway into a quiet workhorse:
- Above-door shelves: One continuous 8–10 inch deep shelf above all three doors, painted to match the wall, holding:
- Out-of-season shoes in labeled boxes
- Spare linens in fabric bins
- Bulk paper goods
- Tension-rod section: A short span of wall gets two tension rods with S-hooks for umbrellas, reusable shopping bags, and a small hanging basket for keys and masks.
- Back-of-door storage:
- Bathroom door: over-the-door rack for extra toiletries and towels.
- Storage-room door: rigid over-the-door rack for cleaning products and light tools.
You haven’t added a single piece of floor furniture, but you’ve created a full dead space organization guide in that hallway alone. The net effect is that other rooms feel less crowded, and the hallway still reads calm because everything is up high or behind doors.
How Much Storage Did You Actually Add?
I like to “do the math” so it doesn’t feel like you’re just installing random shelves.
Here’s a simple way to estimate:
- Above-door shelves:
- Say you have three doors.
- Each shelf is 80 cm / 32″ wide and 25 cm / 10″ deep.
- That’s 0.2 m² / 2.7 sq ft per door.
- Three doors = about 0.6 m² / 8 sq ft of additional surface area.
- One slim kitchen cart:
- 15 cm / 6″ wide, 60 cm / 24″ long, three tiers.
- That’s roughly the same storage as a small base cabinet, tucked into a gap that was previously useless.
- One over-the-door organizer:
- 4–5 shelves or pockets high.
- The equivalent of a narrow wall cabinet magically attached to a door you already had.
Put together, your vertical storage upgrades can easily match or exceed the capacity of another full-size bookcase or small wardrobe, without stealing walking space or making the apartment feel cramped.
In a small space, that’s the real win: more storage, same footprint, calmer rooms.
Quick Recap: Your Vertical Storage Action Plan
If you want to implement this without overthinking it, here’s the simple sequence I recommend:
- Do a “cubic footage” walk-through
- Look above doors, wardrobes, fridges, and in narrow gaps.
- Note every dead zone that could host a shelf, rod, or slim cart.
- Apply the 12-inch rule above at least one door
- Install one painted, wall-colored shelf as a test.
- Use it for passive storage in matching bins or boxes.
- Add at least one tension-rod structure
- Under a sink, between two walls, or inside a closet.
- Use S-hooks and lightweight baskets to build vertical hanging storage.
- Claim the back of one door
- Install a suitable over-the-door organizer.
- Turn it into a specific station (cleaning, pantry, or wardrobe).
- Drop in one slim rolling cart
- Use the “nook audit” to find the best gap.
- Fill it with items that currently live on countertops or floors.
If you’d like, tell me which rooms in your apartment feel the most cramped right now, and I can sketch a room-by-room vertical storage plan tailored to your layout and stuff.